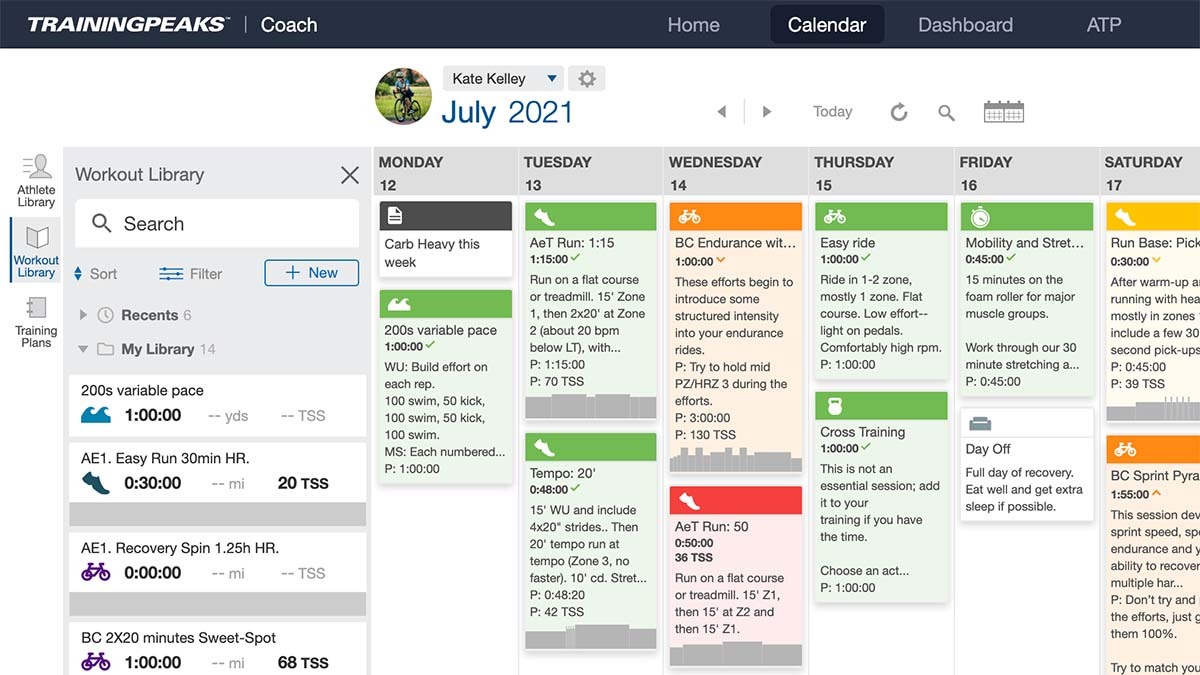
Planning workouts for athletes is a fundamental task of coaching. Especially if you are planning hundreds of workouts per week, it can be easy to create habits—both good and bad. One extra click may not seem like much, but as the extra seconds accumulate for every workout and every athlete, the amount of time can add up significantly. As a result, it is one of the easiest places to waste time as a coach.
Saving time may be the difference between taking on more athletes, giving your current athletes more attention and higher quality coaching, or just freeing up more time for yourself. Whether you are a new coach looking to establish good habits, or an experienced coach looking to save a little time, following our best practices should help efficiently plan high-quality workouts for your athletes.
1) Use the Annual Training Plan
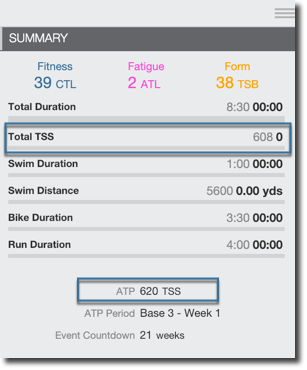
With different athletes training for multiple races at different times of the year across one or more disciplines, it can be easy to lose track of where you are in a planning cycle with an athlete. Re-orienting yourself to an athlete’s annual plan can take a significant amount of time if you are constantly clicking between views within TrainingPeaks.
You can keep yourself on track during your workout planning by configuring your weekly summary layout on the calendar to show relevant Annual Training Plan information needed for weekly planning. First, navigate to the “Week Summary” tab under the “Layout” section of your coach account settings. Here you can decide what information from the ATP to display on your athletes’ calendars as you plan. This way it’s easy to see if your planned volume for that week matches the planned volume from the ATP.
2) Leverage your workout libraries
Most of your workouts should be kept in your “Workout Libraries”, so it’s important to spend time organizing your workouts and library folders in a way that will support your planning workflow. If you are deliberate about how you name your workouts you should be able to find specific workouts easily by using the search bar at the top of the library. If you don’t have a specific workout in mind, there are advanced sorting and filtering options to help you browse workouts based on sport type, duration, and intensity targets like heart rate, power, or pace.
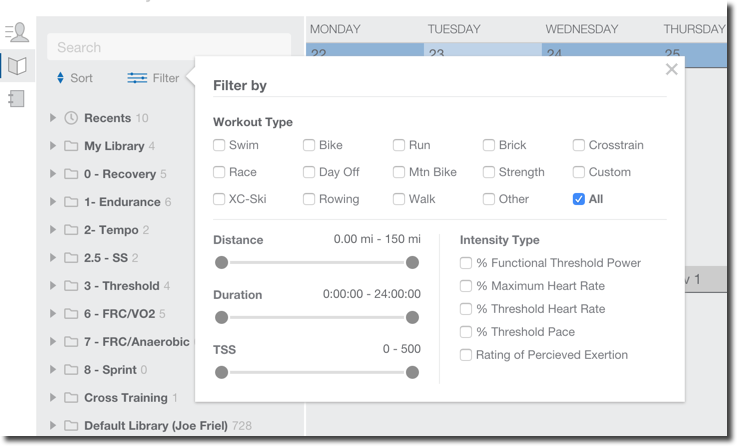
Initially building workouts may seem daunting. That’s why we include the Joe Friel workout library in every new coach account There are over 700 workouts of all sport types to use, copy, and modify for your own libraries.
The best way to build your workout libraries as a new TrainingPeaks coach is to begin by creating workouts on your athlete’s calendars as needed. As you build new workouts, drag your favorites into your workout library to save a copy for future use.
3) Use a system to name your workouts
It’s not uncommon for a coach to have hundreds or even thousands of unique workouts in a library. How you title your workouts can save you a lot of time and effort in the future as your workout libraries grow.
Consistent and descriptive titles will make workouts easier to find using the search bar. Think about how you might search for specific workout types and use that to determine the nature of your descriptive titles.
Do you plan on having an individual workout available for every specific interval session? Use a title like “2 x 20-minute Threshold Power Intervals”. Do you prefer general template-style workouts that you will customize as you apply them? Then you may have a title more like “Threshold Power Intervals – Long”. An extra benefit of good titles is that you will avoid confusion from your athletes.
4) Be clear in your training prescriptions
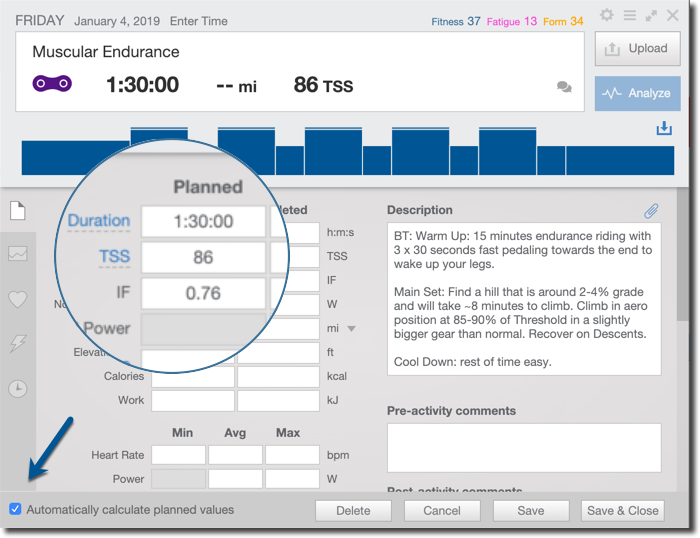
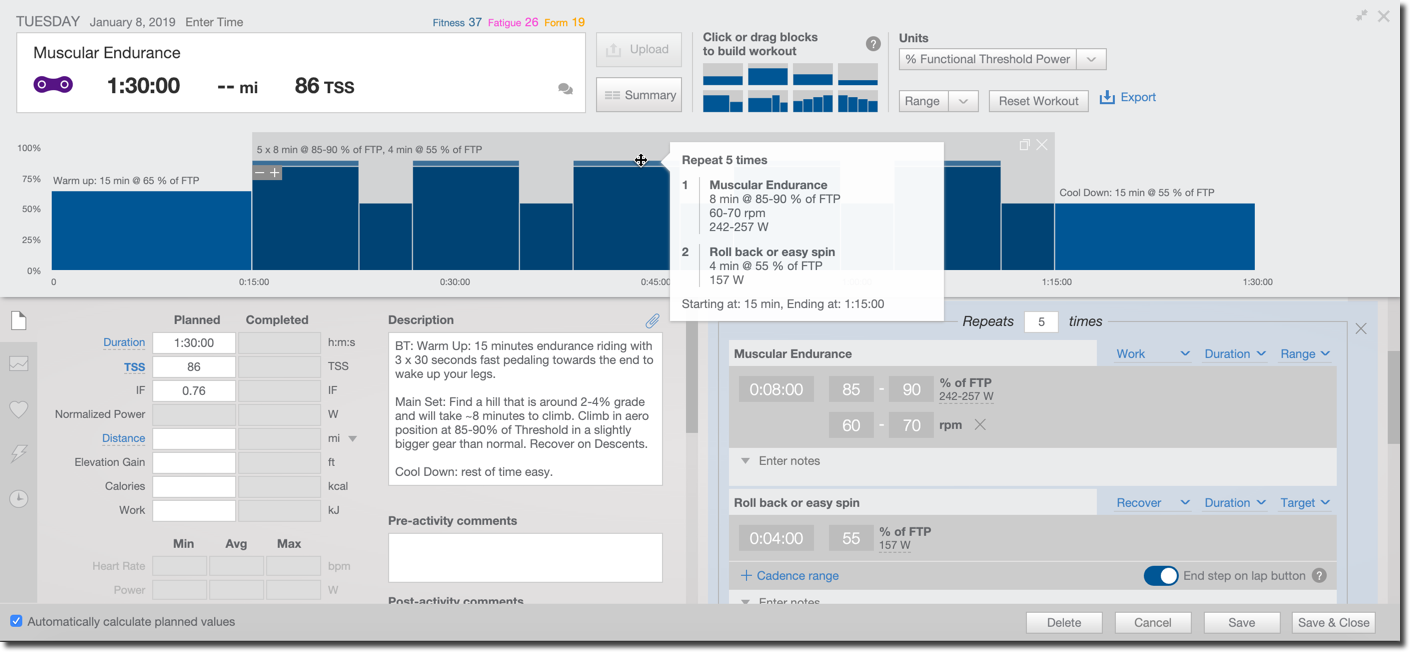
A good workout prescription will contain all of the basic planned values needed to complete the workout. We recommend including the duration (and/or distance for swimming), Intensity Factor (IF), and Training Stress Score (TSS). An athlete should be able to perform something like the workout that you have in mind using nothing but the title and the prescription.
Including these values in every planned workout will also make it much easier to use all of the analytical tools in TrainingPeaks. You can either estimate the values, enter two of them to calculate the third, or use the Workout Builder to add them automatically.
5) Add a description and pre-activity comments to each workout
The “Description” field in TrainingPeaks should convey information you want to be included with that workout regardless of circumstance, while the “Pre-Activity Comments” should be used to customize the workout for a specific situation. At the very least, the fields should include the following:
- Basic instructions – Include any information that your athlete will need to successfully complete the workout that can’t be conveyed in the prescription. Remember, the ”Description” will be included every time the workout is used, while the“Pre-Activity Comments” section is a better place for customization of that workout. For instance, if your athlete should perform that workout on a specific bike or specific pre-workout nutrition recommendations, use the “Pre-Activity Comments”
- The goal of the workout – Some athletes are satisfied with just following instructions, but many others also need to understand the “why” of what they are doing. Understanding the basic goal of workouts can help them complete workouts more successfully and understand how those workouts will lead them to their goals.
- How the workout should feel – Newer athletes need time to calibrate their sense of perceived exertion for different types of workouts, and even experienced athletes may perform some workouts too hard. An expectation of how a workout should feel can help all athletes perform better in training.
6) Use the Structured Workout Builder
The Structured Workout Builder is the easiest way to ensure that a workout has clear instructions, accurate planned values like duration and TSS, and is easy to follow no matter what device or indoor training platform they are using. There are many additional benefits to using the Structured Workout Builder, even for simple workouts like recovery rides.
Keep these best practices in mind as you start planning for your athletes, and the saved clicks will really start to add up. It may take a little more time and effort as you get started, but the time savings and efficiency gains you’ll get as you expand your coaching will be more than worth it.
